
How to Remove Window Tint Safely Without Damaging Your Glass
Window tinting comes with undeniable benefits—reducing glare, enhancing privacy, and protecting against harmful UV rays. However, there comes a time when tint removal becomes necessary. Adhesive bubbles, discoloration, or the need to upgrade to a modern option are common reasons. While remove window tint yourself may seem like a simple DIY effort, it often presents challenges like sticky residue or even scratched glass. But when armed with the right tools and techniques, you can safely complete the process without damaging your windows.
This guide lays out a step-by-step approach to ensure smooth and damage-free tint removal. Plus, we’ll touch on how professional services, like Rogue Films, can make the job even easier while ensuring premium results.
Why Remove Window Tint?
Your once-perfect window tint can deteriorate over time, signaling that it’s time for removal. Here are some common reasons:
- Peeling and Bubbling: Over time, exposure to sunlight and temperature changes can cause the adhesive under the tint film to weaken, resulting in ugly bubbles or peeling edges. Not only does this look unappealing, but it can also obscure visibility.
- Discoloration: Once a sleek black or smoky gray, the tint might fade unevenly, leaving it looking splotchy or brownish. This discoloration impacts your car or home’s aesthetic and reduces its UV-blocking effectiveness.
- Upgrades to Newer Technology: Advances in window films mean today’s products are more durable, thermal-efficient, and stylish. Upgrading often means removing the older, tattered tint first.
No matter the reason, properly removing old tint protects your glass, maintaining its clarity and aesthetics. Rogue Films offers professional window tint installation and removal services to ensure pristine results.

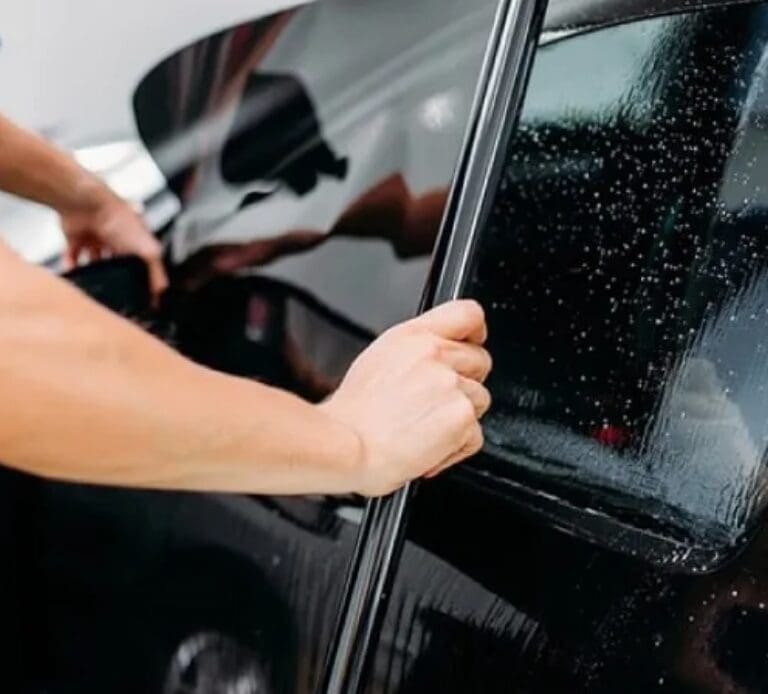
Window Tint Removal Service
Tools and Materials You’ll Need
Before tackling the process, ensure you have the following items:
- Steamer – A key tool for loosening adhesive to make tint removal easier.
- Razor blade or window scraper – Used for peeling and scraping off tint, though it must be handled carefully to avoid scratches.
- Adhesive remover – A chemical solution to aid in removing residue left behind by the old tint.
- Spray bottle – Necessary for applying soapy water or adhesive-removing solutions.
- Microfiber cloth – Ideal for gentle cleaning without introducing scratches.
- Safety gear – Gloves and a mask to protect your skin and lungs when working with chemicals.
- Plastic coverings – To shield areas like door panels or dashboards from water damage or chemical spills.
Having these tools ready ensures the process is as smooth and efficient as possible, helping to prevent mistakes or damage.
Preparing Your Work Area
The right environment can make or break a successful tint-removal project. Here’s how to set up effectively:
Pick a Well-Ventilated and Shaded Area
Direct sunlight can cause cleaning solutions to evaporate too quickly, complicating the removal process. Choose a shaded, cool spot with good cross-ventilation to ensure comfort and effectiveness while working, as it helps prevent unnecessary drying or delays.
Protect Nearby Surfaces
Removing window tint often results in adhesive residue and water runoff that can stain or damage nearby surfaces. Use painter’s tape or plastic coverings to protect door panels, dashboards, and other vulnerable areas, ensuring the surrounding space stays clean and safe.
Test a Small Area First
Before fully committing to your chosen method, test it on a small, inconspicuous corner of the window. This ensures that the glass, frame finishes, or coatings won’t be damaged during the tint removal process, giving peace of mind.
Proper preparation minimizes risks and sets you up for success.
The Steaming Technique
Steam is one of the most effective ways to loosen and safely remove window tint. Follow this step-by-step process:
Heat the Tint with a Steamer
Direct the steam onto a section of the window, focusing on a top corner. The heat softens the adhesive without drying it out, making it easier to loosen the film for removal.
Start Peeling from the Edge
Using a razor blade, carefully lift the corner of the tint film. Once a section is loose, slowly peel it back with your fingers. Avoid applying too much force to prevent rips or tears.
Continue with Steam
Work in small sections, steadily applying steam as you peel the film. Taking your time ensures an even removal process and minimizes leftover pieces of film or stubborn adhesive residue.
Tackle Adhesive Residue Immediately
Once the tint is fully removed, clean off any adhesive residue while it is still warm. Use an adhesive remover paired with a microfiber cloth to achieve a smooth, residue-free surface.
Bonus Tip: Keeping a trash bag nearby is essential for easy disposal of removed tint film, ensuring a clean workspace and preventing clutter during the removal process.
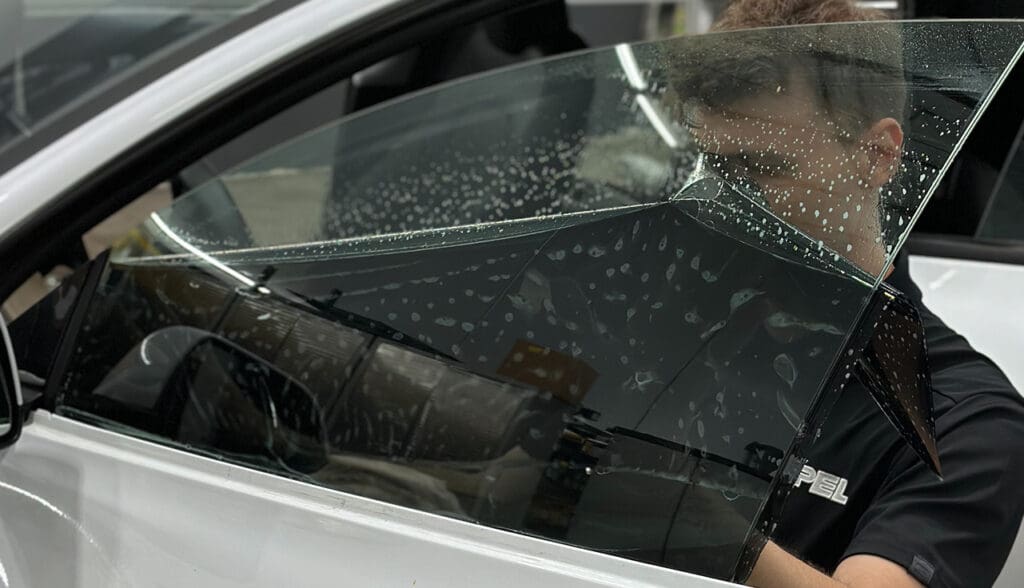
Window Tint Removal Service Provider
Soap and Scraping Technique
If a steamer isn’t available, this soap-and-scraping method is highly effective. Remember to proceed with care to avoid scratches:
Apply a Soap Solution
Mix warm water with dish soap in a spray bottle and thoroughly saturate the window tint film. Ensure the solution seeps into edges or bubbles for maximum effectiveness in loosening the adhesive.
Let It Sit
Allow the soapy solution to soak into the tint film for 15 to 20 minutes. This soaking process softens the adhesive, making it significantly easier to peel off the film without tearing.
Scrape at an Angle
Using a sharp razor blade or specialized window scraper, carefully scrape the softened tint film at a 30-45° angle. Work slowly and gently to avoid causing any scratches or damage to the glass.
Wipe Down
Once the film is removed, clean the glass to remove any sticky adhesive residue. Use an adhesive remover or soapy water with a microfiber cloth for a streak-free, polished finish.
How to Remove Sticky Residue
Even after the tint is gone, stubborn adhesive may still cling to the glass. Here’s how to handle it:
Use Adhesive Remover
Apply a store-bought adhesive remover or a homemade solution made with rubbing alcohol and dish soap. Spray the solution onto the sticky areas and allow it to sit for a couple of minutes.
Rub Gently
Using a microfiber cloth, rub the adhesive residue in firm, circular motions. Avoid applying excessive pressure or harsh scrubbing, as this could potentially damage the surface of the glass.
Repeat if Necessary
For stubborn adhesive, you may need multiple applications to fully remove it. Repeat the process patiently, ensuring each attempt gradually eliminates the remaining stubborn residue without causing any harm to the glass.
Common Mistakes to Avoid
Here are a few pitfalls to steer clear of when removing window tint:
Using Dull Blades
A dull razor blade is more likely to cause scratches on your windows during tint removal. Always opt for a sharp, clean blade to ensure a safer and more efficient process.
Rushing the Process
Skipping essential preparation steps or not giving adhesives enough time to loosen often results in torn tint film or leftover residue. Take your time to ensure a smooth and thorough removal experience.
Applying Harsh Chemicals
Using harsh window cleaning agents can harm the glass or leave irreversible streaks. Choose gentle cleaners specifically designed for windows to prevent any long-term damage and ensure a spotless, streak-free finish.
For tricky tint jobs, Rogue Films specializes in professional-grade removal techniques designed to eliminate risks and provide pristine results.
When to Call the Professionals (Rogue Films)
Sometimes, attempting tint removal on your own isn’t ideal. Extremely old or stubborn tint might not come off easily without professional-grade tools and expertise. Rogue Films offers an efficient and detail-oriented tint removal service, so you can save time and avoid potential mishaps.
Here’s why you should consider professional help for advanced scenarios:
- Access to Specialized Tools
- Expertise in Handling Difficult Situations
- Time Efficiency
Professionals like Rogue Films can upgrade your tint film with modern options that enhance UV protection, improve privacy, and elevate aesthetics. These advanced films ensure optimal performance while giving your vehicle or space a sleek, contemporary look.
Auto Window Tint Removal
Maintaining Your Glass After Removing Tint
Once the tint is gone, it’s crucial to care for your exposed windows. Here’s how to keep them in top shape:
Invest in Quality Glass Cleaner
Use ammonia-free products specifically designed for windows to safeguard your glass from streaks and damage. High-quality glass cleaners will ensure your windows remain crystal clear while preventing unnecessary wear and tear over time.
Apply New Window Tint
For consistent UV protection, privacy, and improved energy efficiency, opt for fresh window tint. Rogue Films provides a diverse range of modern tinting options to match your personal style and practical requirements, ensuring long-lasting durability and aesthetics.
Schedule Periodic Maintenance
Regularly maintaining your windows by cleaning and inspecting for scratches will help preserve their longevity. Clear, well-maintained glass enhances visual appeal while ensuring both your car and property retain their overall sleek and polished look.
Conclusion
Removing old window tint doesn’t have to be intimidating. By following the right preparation steps, using appropriate tools, and applying proven methods like steaming or soaping, you can achieve clear, residue-free windows. While DIY is certainly possible for confident individuals, hiring professionals like Rogue Films minimizes risks and maximizes results.
If you’re ready to refresh your windows or upgrade to a new tint, reach out to Rogue Films for expert removal and tint installation services today!